Cloud Images - One Drive

Microsoft OneDrive offers a free, basic version that provides up to 5 GB of online cloud storage. It is not necessary to upgrade to any of the paid versions - the free basic edition satisfies The Edge requirements.
If you have never used OneDrive before, you will need to complete the following before proceeding:
Once installed, you must set up OneDrive on your Edge workstation:
1. Locate the OneDrive icon in your Window's system tray (bottom right, by the clock).

2. Left click on the OneDrive icon, then use the Sign In button to login with your Microsoft Account. If you are already logged in, skip step 3.
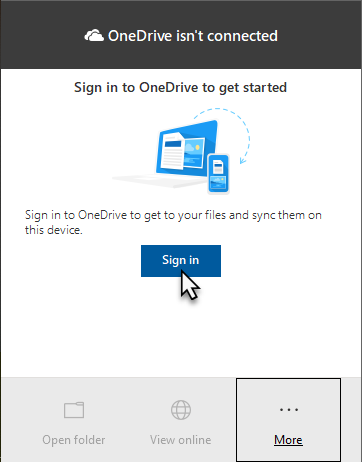
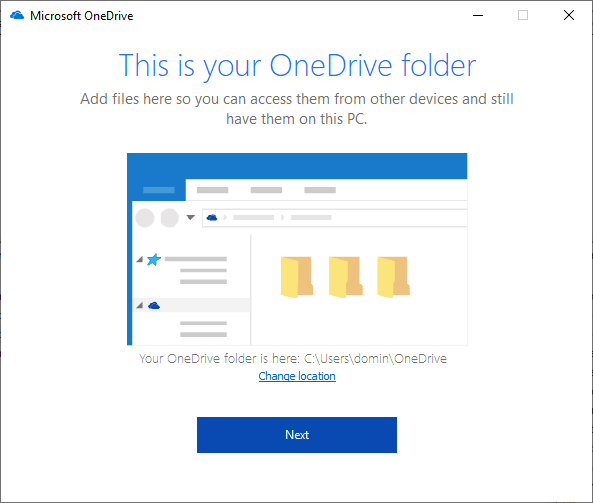
3. If this is your first time signing in you will be prompted to complete the setup wizard. Click your way through until it's completed. OneDrive will offer to upgrade you to the paid version - this is not required.
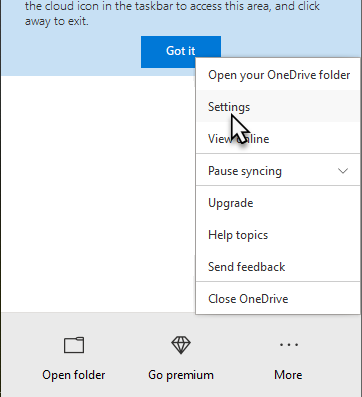
4. Right click on the OneDrive icon in the system tray and left click Open your OneDrive Folder.
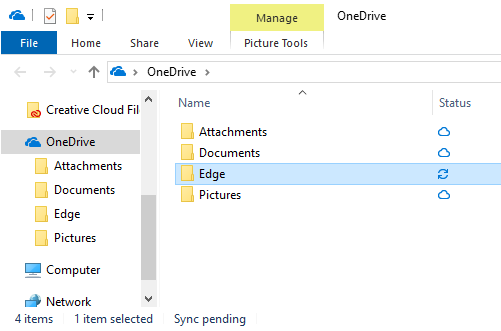
5. Your OneDrive folder will appear showing which folders are currently synchronized with the cloud. These folders can be changed by going to Settings > Account tab and using the Choose Folders button.
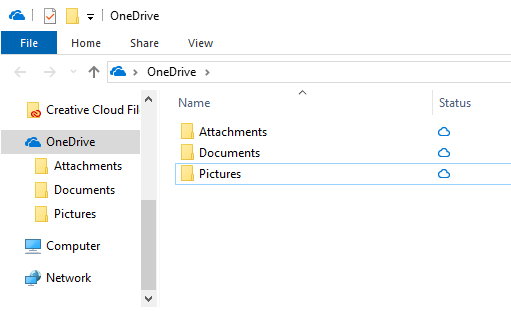
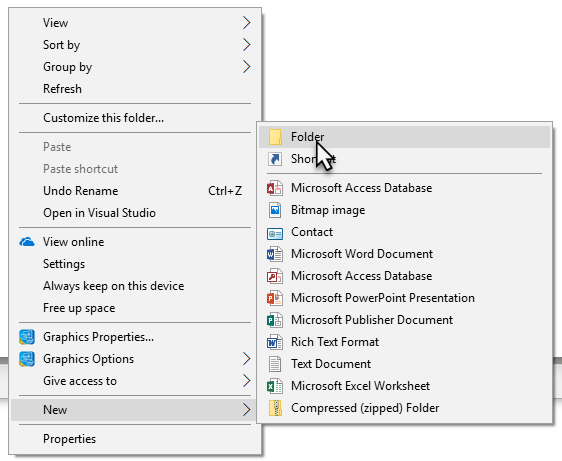
6. Right click on an empty spot within this folder, then select New > Folder. Name this new folder Edge.
7. Right click on the OneDrive icon in your system tray, then left click on Settings.

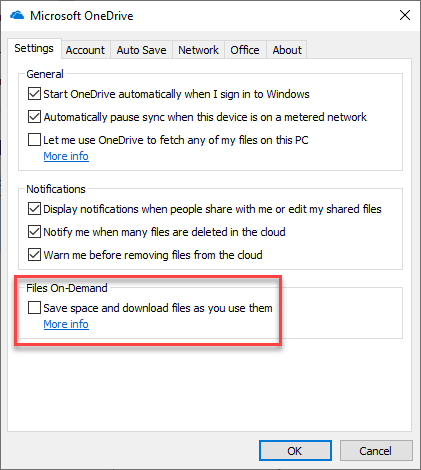
8. Click on the Settings tab. In the Files On-Demand section, find the option Save space and download files as you use them and make sure this option is unchecked.
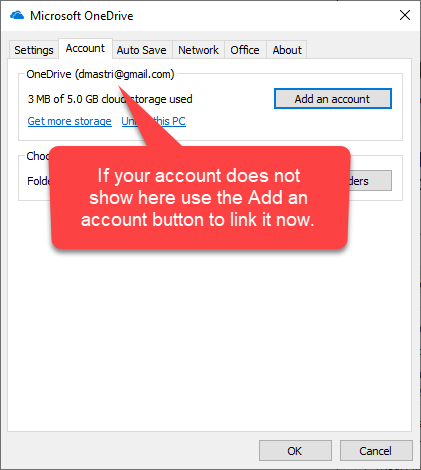
9. Click on the Account tab. Verify the correct account is linked at the top. If no account shows as linked, use the Add an account button to link it now. If you had to link your account now, you may need to repeat steps 4 - 8.
10. Click OK to save your OneDrive changes. The OneDrive portion of setup is now complete.
Next, you must configure The Edge:
1. Open The Edge and click on Administrative > Configuration.
2. Find the section titled Cloud Image Folder Locations. Click on Folder 1, then click the browse button (three dots) to the right.
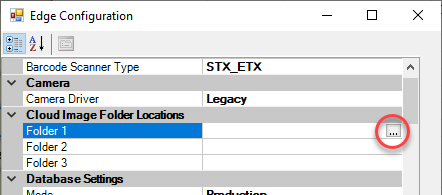
3. In the Browse For Folder window, click the OneDrive drop-down, select the Edge folder, and click OK.
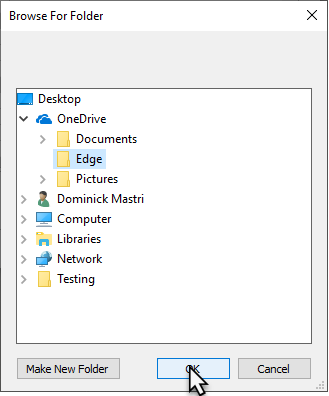
4. Click OK to save your changes and close Configuration.
5. Restart The Edge.
Then, you must install OneDrive on the smartphone you will be using to take pictures:
1. On your smartphone, go to the App Store.
2. Search for the Microsoft OneDrive app and install it.

3. Open the OneDrive app on your phone and sign in with the same account linked to your PC.
4. Tap the Files tab at the bottom.
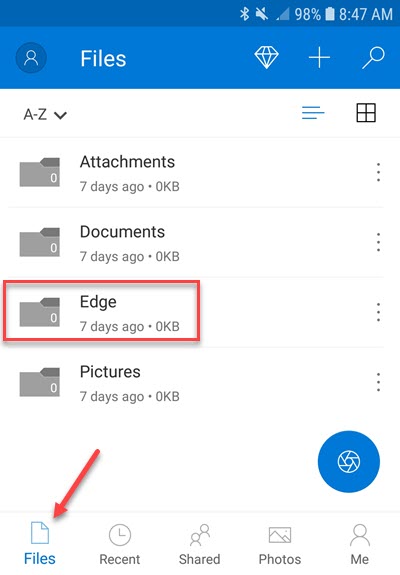
5. You should see the Edge folder we created earlier on the workstation. If you see this folder, you are all set - OneDrive & The Edge are now linked. You can proceed to the next section to learn how to take photos.
If you do not see this folder, verify you have logged into the same OneDrive account on both your PC and smartphone.
You can now acquire photos using your smartphone and use them instantly in The Edge. Photos can be taken directly from the OneDrive app or you can use the GemLightBox app.
Though designed to be used with the GemLightBox, the GemLightBox app is free and can be used without the box. We recommend using their app because its default settings are optimized for taking photos for the web (high quality, but reasonable file size).
|
|
See the following links for instructions on taking photos:


Abbott Jewelry Systems, Inc.
Makers of The Edge®
3 Corporate Drive #215
Shelton, CT 06484
1-855-TRY-EDGE

